Importing Data into LoadOps is easier than ever with custom field mapping
In this article
Import Section:
The Import section lets you import your existing data into LoadOps. You can add the data by importing your excel file. Currently, we accept XLS and XLSX file types.
Here are the categories you can import:
- Customers (shippers and brokers)
- Locations (pickups and drop-offs)
- Drivers
- Tractors
- Trailers
- Loads
- Expenses (fuel and tolls)
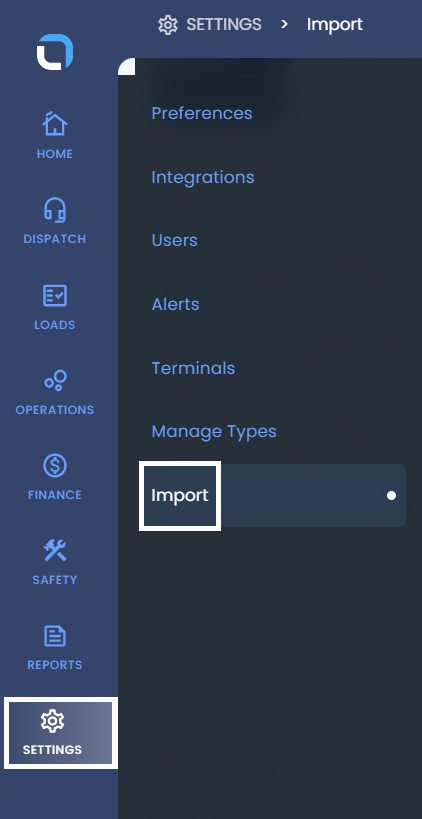
You can import all your data directly from the Import section. You can start by navigating from the left side of the navigation bar, Settings > Import, as shown in the below screenshot.
Import Process
The Import process can be done from the below steps:
- You can start by downloading the sample data file for any of the import categories and then make sure your data is added correctly to the sample file
- Or you can go directly to upload your data file and program the mapping of the fields
- Click on the Upload button from the right side of the screen as shown in the below Image.
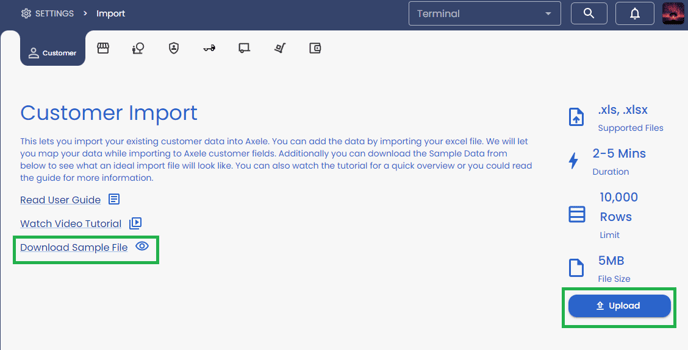
Image 1 - Browse to the data file or just drag and drop it on the popup (you should be able to see the data and the file name imported), scroll down on the same page, and click on next. You can follow Image 2
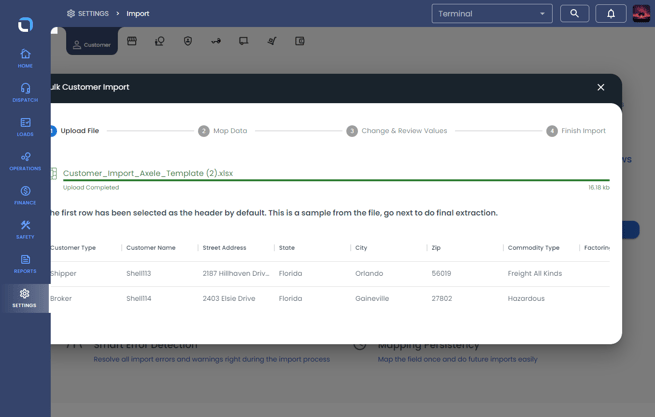
Image - 2
- The next step would be to map the values to the date columns, you can click on the eye icon to view the sample values. Once mapped you can scroll down on the same page and click on next. You refer to Image 3
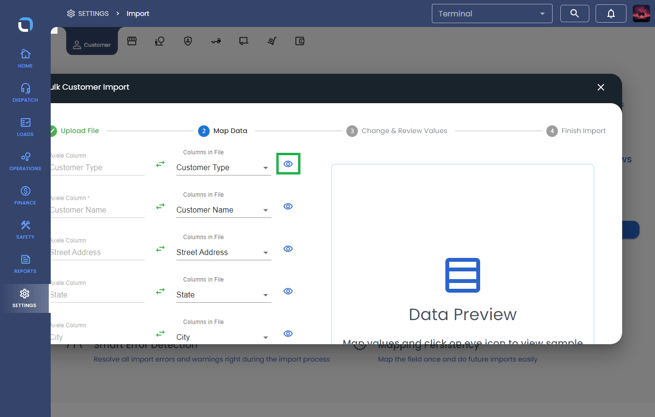
Image - 3
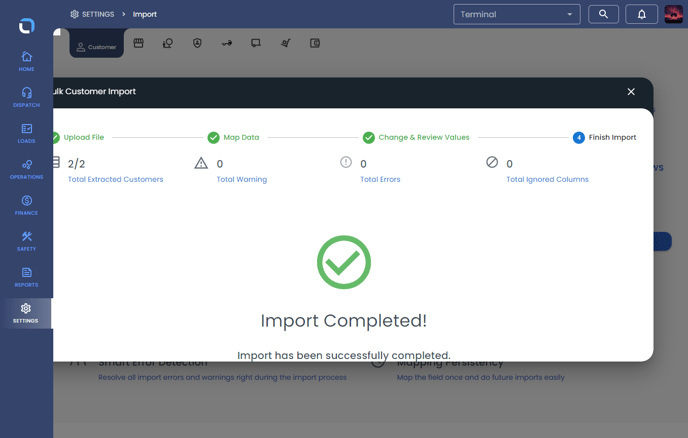
- The last and most important step is to review the values and change them if needed. If the data is incorrect in any of the columns and rows it will be highlighted in the color red as an error and the color yellow as a warning. Warnings do not prevent files from being uploaded. Errors are required data. You can follow Image 4
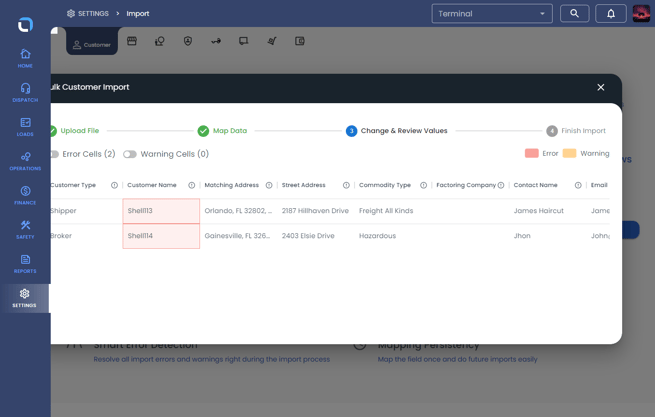
Image 4
Note: To change the data in the error cell, you would require to double-click on the cell and enter the correct data. Once done you can scroll down on the same page and click on Import.
- Once the data is imported successfully you can see the successful message on the screen.